Credits
['lookang']
Integrating xAPI with EJS Simulations: A Step-by-Step Guide
If you're an EJS (Easy JavaScript Simulations) user looking to enhance your simulations with xAPI (Experience API) capabilities, you've come to the right place. This guide will walk you through the process of integrating xAPI into your EJS simulations. We'll provide detailed instructions and code snippets to make the integration seamless.
What is xAPI?
xAPI is a specification that allows learning content and learning systems to communicate with each other about learner actions. It enables the collection of data about a wide range of experiences a learner has (both online and offline). By integrating xAPI into your EJS simulations, you can track user interactions, scores, and more.
Prerequisites
- Basic Knowledge of EJS: Familiarity with creating and editing EJS simulations.
- Understanding of JavaScript: Basic knowledge to modify and insert code.
- xAPI Endpoint and Credentials: Access to an LRS (Learning Record Store) endpoint, along with authentication details.
Video
https://www.youtube.com/watch?v=3x9rehK5kdU
In this video, we walk through integrating interactive JavaScript simulations with the Singapore Student Learning Space (SLS) by implementing score-reporting functionality. Learn to use xAPI to capture user interactions and send these scores seamlessly to the SLS platform. The tutorial includes step-by-step guidance, from editing your HTML file to embedding existing xAPI code, ensuring accurate score tracking.
By the end, you’ll be able to:
- Enhance your simulations with score integration into SLS.
- Utilize GPT4o to simplify coding with ready-to-use examples.
- Create enriched, interactive learning experiences for your students.
Resources Mentioned in the Video:
- Creating HTML5 Content for Interactive Response
HTML5 Content Development Guide - Open Source Physics Singapore Resources
Electrolysis Virtual Lab xAPI - webEJS
webEJS Interactive Simulations - AI Support
GPT4o Code Assistance - SLS Sandbox Links
Preview Mode Example 1
Preview Mode Example 2
Tools for Video Production:
- Video Editing: CapCut
- Audio Generation (TTS): TTS Server 2 - Guy
- Transcription: Otter.ai
- Talking Script Assistance: ChatGPT
Popular Tags:
#JavaScriptSimulations #SLSIntegration #xAPICode #EducationalSimulations #InteractiveLearning #StudentLearningSpace #HTML5ContentDevelopment #LearningAnalytics #EdTechTools #MOESLSGuide #AIinEducation #SimulationBasedLearning
If you found this tutorial helpful:
- Like, share, and subscribe for more SLS-related content.
- Drop your questions and feedback in the comments section! Let’s collaborate to enhance interactive education.
Text Description
Here are the steps mentioned in the video on how to configure an interactive response item to send scores natively to SLS:
 |
| note the sendScore() is recorded in SLS as 2/9 as I only completed 2 tasks out of 9 |
 |
| https://sg.iwant2study.org/ospsg/index.php/1227-21ccgem |
Step 1: Prepare the Script
- Obtain the Script: https://www.learning.moe.edu.sg/teacher-user-guide/author/html5-content-development/ Download a preconfigured file containing the necessary script. Download sample package here
- Copy the Relevant Code: Open the file in a code editor (e.g., the web version of VS Code). Copy the code from line 6 to line 58.
Step 2: Enable JavaScript Simulation (EJS) to Send Scores
- Access Simulation Properties: Go to the simulation properties within your interactive response item.
- Navigate to Run Options: Locate the "Run Options" section.
- Paste the Script: Paste the copied script into the designated area within the "Run Options."
- Add the Library File: Click the "plus" button to add the library file (xapiwrapper.min.js) to EJS. Select "Upload" and choose the file.
Step 3: Configure Score Sending Functionality
- Use the
sendScore()Function: Implement thesendScore()function to send scores to SLS. For example, to send two points, usesendScore(2). - Adjust for Existing Interactives: If you're working with an existing interactive, you might need to modify the code to accommodate its specific scoring logic. This may involve adjusting how points are awarded based on user interactions (e.g., selecting options from a combo box).
Step 4: Test the Setup
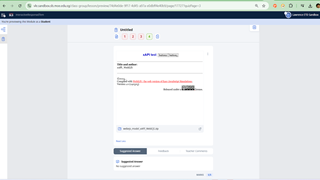
- Upload the Interactive File: Upload the interactive file to SLS in edit mode.
- Add a Page: Insert a new page before the interactive response item.
- Drag and Drop the File: Drag and drop the interactive file onto the new page and upload it.
- Configure Maximum Allowable Score: Ensure the maximum allowable score in SLS settings matches the scoring logic within your interactive.
- Preview in Student Mode: Preview the simulation in student mode to test if scores are being sent correctly to SLS.
Additional Notes:
- The video emphasizes the use of an AI engine to assist in generating the necessary code for specific scoring scenarios. in this case, look through the code as find something like score++, and add sendScore(score); // one line code only
- It's crucial to review the generated code to understand its logic and make any necessary adjustments.
- For complex interactives, consider declaring and initializing variables as global to ensure proper functionality.
By following these steps, you can effectively configure your interactive response items to send scores natively to SLS, providing valuable data for assessment and analysis.
- Details
- Written by Loo Kang Wee
- Category: How to
- Hits: 1574


