About
Topics
Measurement of length and timeDescription
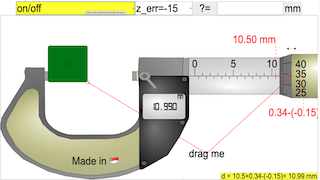
Play with the Micrometer Model. Test what you've learned by trying the input field.Micrometers use the principle of a screw to amplify small distances that are too small to measure directly into large rotations of the screw that are big enough to read from a scale. The accuracy of a micrometer derives from the accuracy of the thread form that is at its heart. The basic operating principles of a micrometer are as follows:
The amount of rotation of an accurately made screw can be directly and precisely correlated to a certain amount of axial movement (and vice-versa), through the constant known as the screw's lead. A screw's lead is the distance it moves forward axially with one complete turn (360°). (In most threads [that is, in all single-start threads], lead and pitch refer to essentially the same concept.)
With an appropriate lead and major diameter of the screw, a given amount of axial movement will be amplified in the resulting circumferential movement.
The micrometer has most functional physical parts of a real micrometer.
Frame (Orange)
The C-shaped body that holds the anvil and barrel in constant relation to each other. It is thick because it needs to minimize expansion, and contraction, which would distort the measurement. The frame is heavy and consequently has a high thermal mass, to prevent substantial heating up by the holding hand/fingers. has a text 0.01 mm for smallest division of instrument has a text 2 rounds = 100 = 1.00 mm to allow association to actual micrometer
Anvil (Gray)
The shiny part that the spindle moves toward, and that the sample rests against.
Sleeve / barrel / stock (Yellow)
The stationary round part with the linear scale on it. Sometimes vernier markings.
Lock nut / lock-ring / thimble lock (Blue)
The knurled part (or lever) that one can tighten to hold the spindle stationary, such as when momentarily holding a measurement.
Screw
(not seen) The heart of the micrometer It is inside the barrel.
Spindle (Dark Green)
The shiny cylindrical part that the thimble causes to move toward the anvil.
Thimble (Green)
The part that one's thumb turns. Graduated markings.
Ratchet (Teal)
(not shown ) Device on end of handle that limits applied pressure by slipping at a calibrated torque.
This applet has an object (Black)
with slider on left top to control the y-motion of the object into the anvil and spindle (jaws), the graphics also allows drag action.
with slider on left bottom to control the x-size of the object into the anvil and spindle (jaws).
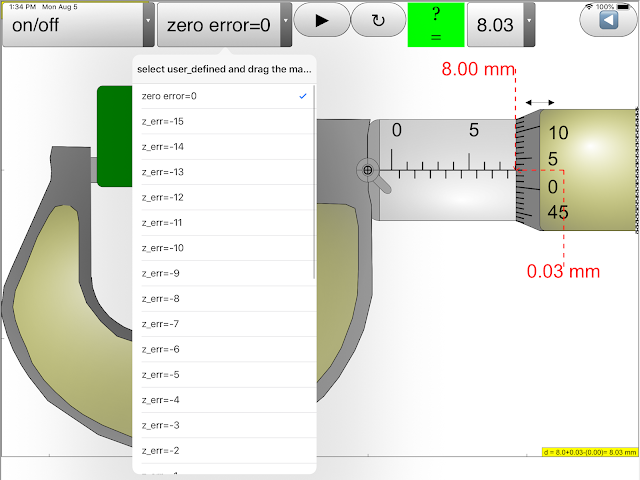
On the left bottom slider is the zero error control to allow of exploring with if the micrometer has either +0.15 mm (max) or -0.15mm (min) zero error. The are check boxes:
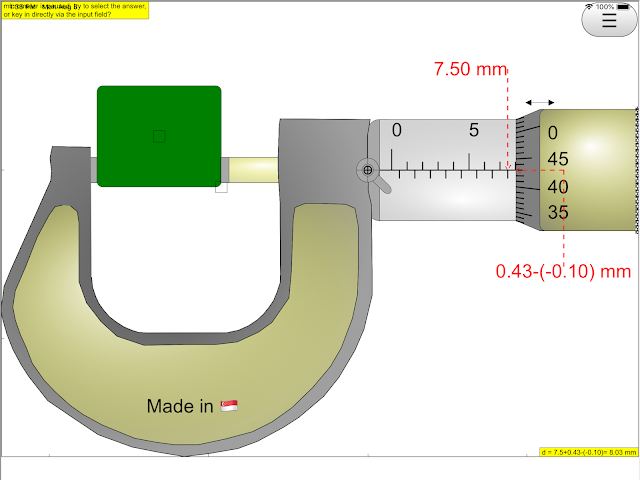
hint: guide lines and arrows to indicate the region of interest plus the accompanying rationale for the answer.
answer: shows the measurement d = ??? mm
lock: allows simulating of the lock function in real micrometer which disable changes to the position of the spindle then by the measurement is unchangeable.
On the bottom there is a green slider to control the position of the spindle, drag on any part of the view also drags the spindle.
There is 2 buttons left and right fine control to allow for single incremental change of the measurement, to allow learners to sense the rotation simulation of the spindle with the many lines to simulate the coarse pattern to increase friction between fingers and on the thimble and ratchet.
The reset button restores learning environment to default setting
Research
arXiv:1408.3803 [pdf]Vernier caliper and micrometer computer models using Easy Java Simulation and its pedagogical design feature-ideas to augment learning with real instruments
Loo Kang Wee, Hwee Tiang Ning
Comments: 8 pages, 8 figures, Physics Education journal
Subjects: Physics Education (physics.ed-ph); Instrumentation and Detectors (physics.ins-det)
https://youtu.be/jHoA5M-_1R4
https://youtu.be/I-RZxhyZVio
Sample Learning Goals
(g) describe how to measure a variety of lengths with appropriate accuracy by means of tapes, rules, micrometers and calipers, using a vernier scale as necessary.Version:
- http://weelookang.blogspot.sg/2015/07/ejss-micrometer-model.html?m=1
- http://weelookang.blogspot.sg/2010/06/ejs-open-source-micrometer-java-applet.html
- http://iwant2study.org/lookangejss/01_measurement/ejs/ejs_model_Micrometer02.jar
- http://www.phy.ntnu.edu.tw/ntnujava/index.php?topic=567.msg2364#msg2364
- http://www.phy.ntnu.edu.tw/ntnujava/index.php?topic=683.msg2451#msg2451
Translations
| Code | Language | Translator | Run | |
|---|---|---|---|---|
 |
||||
Credits


![]() Fu-Kwun Hwang; lookang; Wolfgang Christian
Fu-Kwun Hwang; lookang; Wolfgang Christian
Check out Digital Micrometer 0-25mm Electronic Digital Outside Micrometer 0.001mm High Precision Depth Micrometer Micro Caliper. Get it on Shopee now! https://shope.ee/2L8dZ2WXCY?share_channel_code=1
20231003 Update on WEBEJS: https://macmath.inf.um.es/
- more worksheets:
 Physics_lab_Sharjah_
University_Tahani_Alsarayreh - Worksheet 📖 ejss_model_Micrometer02 Tahani Ibrahim Ragheb AL Sarayreh physics department :Sharjah University : UAE measurment of density.docx 06 June 2020
- Worksheet 📖 ejss_model_Micrometer02 Tahani Ibrahim Ragheb AL Sarayreh physics department :Sharjah University : UAE measurment of density.pdf 06 June 2020
- Worksheet 📖 :ejss_model_Micrometer02_measurments of density 1 Nawal Nayfeh, Physics instructor at university of sharjah, UAE.pdf 25 May 2020
- Worksheet 📖 :ejss_model_Micrometer02_measurments of density 1 Nawal Nayfeh, Physics instructor at university of sharjah, UAE.docx 20 May 2020
Learnng Objectives https://sites.google.com/moe.edu.sg/a-level-physics-tlg/foundations-of-physics
Errors, uncertainties, precision and accuracy through practical work
Learning Outcomes:
-
H2: 1(f), 1(g)
Curriculum Emphasis:
-
Ways of Thinking and Doing
Can uncertainty be reduced or even eliminated? How do measurement uncertainties propagate to derived quantities?
Identify and discuss how errors and uncertainties arise in specific measurements and experiments that students carry out, and discuss ways to reduce the errors and uncertainties. It is also possible to discuss the concepts of precision and accuracy using the data collected.
This is a way of building on existing practical work throughout the year to reinforce students' understanding of error and uncertainty through experiential learning.
Resources:
Apps

https://play.google.com/store/apps/details?id=com.ionicframework.micrometerapp268865
https://itunes.apple.com/us/app/micrometer-simulator/id1164367611?mt=8
Topics
Measurement of length and time
For Teachers
Title: Mastering Precision with Digital Micrometer: A Journey through Manual Operation with JavaScript HTML5 Applet Simulation
Introduction:
In the realm of precision measurements, the digital micrometer stands as a symbol of accuracy and meticulousness. With advancements in technology, we can now delve into the intricacies of manual operation using a Digital Micrometer Simulation Model crafted with JavaScript HTML5 Applet. This blog takes you on a journey through the functionalities and applications of this innovative simulation, offering insights into the world of precise measurements.
Understanding the Digital Micrometer:
Before we dive into the simulation, let's briefly understand what a digital micrometer is. A digital micrometer is a sophisticated measuring instrument designed to provide precise measurements with digital readouts. It consists of a frame, anvil, sleeve, lock nut, screw, spindle, thimble, and a digital display. The instrument's ability to measure with exceptional accuracy makes it indispensable in various fields, from manufacturing to laboratory experiments.
 |
| https://sg.iwant2study.org/ospsg/index.php/1189-digitalmicrometer direct link |
**Digital Micrometer Simulation Model Features:**
The Digital Micrometer Simulation Model, built with JavaScript HTML5 Applet, replicates the real-world micrometer with striking accuracy. Let's explore its features:
1. **Visual Elements:**
- Frame: The C-shaped body maintaining constant relation between the anvil and barrel.
- Anvil: The part against which the sample rests.
- Sleeve/Barrel/Stock: The stationary round part with a linear scale and sometimes vernier markings.
- Lock Nut/Lock-Ring/Thimble Lock: The knurled part used to hold the spindle stationary.
- Screw: The heart of the micrometer, inside the barrel.
- Spindle: The shiny cylindrical part moved toward the anvil.
- Thimble: The part turned by the thumb with graduated markings.
- Ratchet: A device limiting applied pressure by slipping at a calibrated torque.
2. **Fine Control Arrows:**
- For learners to manipulate the model with single incremental precision control.
 |
| https://sg.iwant2study.org/ospsg/index.php/1189-digitalmicrometer direct link |
3. **Measurement Precision:**
- Micrometer provides measurements up to two decimal places in millimeters.
**Manual Operation Explained:**
The simulation allows users to engage in manual operations, simulating real-world scenarios. Users can:
- Set zero errors.
 |
| https://sg.iwant2study.org/ospsg/index.php/1189-digitalmicrometer direct link |
 |
| https://sg.iwant2study.org/ospsg/index.php/1189-digitalmicrometer direct link |
- Run the micrometer to move automatically, but this version is manual for pedagogical reasons
- Reset the simulation to its default setting. by refreshing the browser.
- Toggle between combobox or input field for ease by clicking the "?=" button
- Opt for a full-screen view for enhanced visibility but it is not available as I have decided on this layout.
**Applications and Benefits:**
1. **Educational Tool:**
- Ideal for educators and students to teach and learn the principles of micrometer operation.
- Enhances understanding of measurement precision and instrument manipulation.
2. **Training Aid:**
- A valuable tool for professionals and technicians to hone their skills in using digital micrometers.
- Provides a risk-free environment for training without the need for physical instruments.
**How to Access the Simulation:**
- The simulation can be experienced by visiting https://sg.iwant2study.org/ospsg/index.php/1189-digitalmicrometer direct link
- Explore all the other measurement simulation https://sg.iwant2study.org/ospsg/index.php/interactive-resources/physics/01-foundations-of-physics/quantities-measurement
**Conclusion:**
The Digital Micrometer Manual Use JavaScript HTML5 Applet Simulation Model opens a gateway to mastering precision in measurement. Whether you're an enthusiast, student, educator, or professional, this innovative simulation offers a hands-on experience in operating a digital micrometer. Embrace the future of precision measurement education with this powerful tool, and unlock the secrets of accurate readings and meticulous craftsmanship.
Description
Play with the Micrometer Model. Test what you've learned by trying the input field.
Micrometers use the principle of a screw to amplify small distances that are too small to measure directly into large rotations of the screw that are big enough to read from a scale. The accuracy of a micrometer derives from the accuracy of the thread form that is at its heart. The basic operating principles of a micrometer are as follows:
The amount of rotation of an accurately made screw can be directly and precisely correlated to a certain amount of axial movement (and vice-versa), through the constant known as the screw's lead. A screw's lead is the distance it moves forward axially with one complete turn (360°). (In most threads [that is, in all single-start threads], lead and pitch refer to essentially the same concept.)
With an appropriate lead and major diameter of the screw, a given amount of axial movement will be amplified in the resulting circumferential movement.
The micrometer has most functional physical parts of a real micrometer.
Frame (Orange)
The C-shaped body that holds the anvil and barrel in constant relation to each other. It is thick because it needs to minimize expansion, and contraction, which would distort the measurement. The frame is heavy and consequently has a high thermal mass, to prevent substantial heating up by the holding hand/fingers. has a text 0.01 mm for smallest division of instrument has a text 2 rounds = 100 = 1.00 mm to allow association to actual micrometer
Anvil (Gray)
The shiny part that the spindle moves toward, and that the sample rests against.
Sleeve / barrel / stock (Yellow)
The stationary round part with the linear scale on it. Sometimes vernier markings.
Lock nut / lock-ring / thimble lock (Blue)
The knurled part (or lever) that one can tighten to hold the spindle stationary, such as when momentarily holding a measurement.
Screw
(not seen) The heart of the micrometer It is inside the barrel.
Spindle (Dark Green)
The shiny cylindrical part that the thimble causes to move toward the anvil.
Thimble (Green)
The part that one's thumb turns. Graduated markings.
Ratchet (Teal)
(not shown ) Device on end of handle that limits applied pressure by slipping at a calibrated torque.
This applet has an object (Black)
with slider on left top to control the y-motion of the object into the anvil and spindle (jaws), the graphics also allows drag action.
with slider on left bottom to control the x-size of the object into the anvil and spindle (jaws).
On the left bottom slider is the zero error control to allow of exploring with if the micrometer has either +0.15 mm (max) or -0.15mm (min) zero error. The are check boxes:
hint: guide lines and arrows to indicate the region of interest plus the accompanying rationale for the answer.
answer: shows the measurement d = ??? mm
lock: allows simulating of the lock function in real micrometer which disable changes to the position of the spindle then by the measurement is unchangeable.
On the bottom there is a green slider to control the position of the spindle, drag on any part of the view also drags the spindle.
There is 2 buttons left and right fine control to allow for single incremental change of the measurement, to allow learners to sense the rotation simulation of the spindle with the many lines to simulate the coarse pattern to increase friction between fingers and on the thimble and ratchet.
The reset button restores learning environment to default setting
For Students
- the first part is contributed by the main scale on the sleeve
- the second part is contributed by the rotating vernier scale on the thimble
The 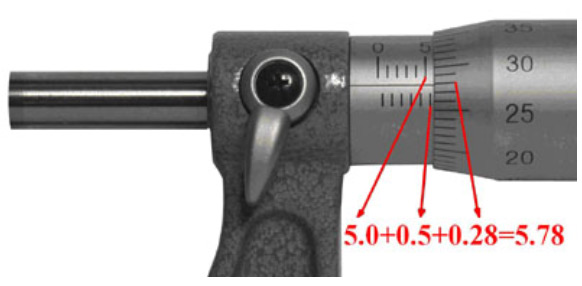
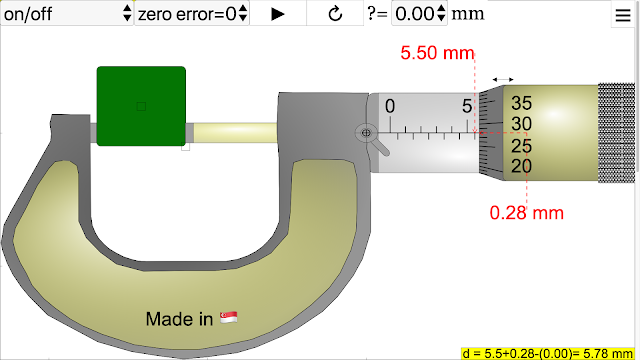 image shows a typical micrometer screw gauge and how to read it. Steps:
- To obtain the first part of the measurement: Look at the image above, you will see a number 5 to the immediate left of the thimble. This means 5.0 mm. Notice that there is an extra line below the datum line, this represents an additional 0.5 mm. So the first part of the measurement is 5.0+0.5=5.5 mm.
- To obtain the second part of the measurement: Look at the image above, the number 28 on the rotating vernier scale coincides with the datum line on the sleeve. Hence, 0.28 mm is the second part of the measurement.
You just have to add the first part and second part of the measurement to obtain the micrometer reading: 5.5+0.28=5.78 mm.
To ensure that you understand the steps above,
here’s one more example: 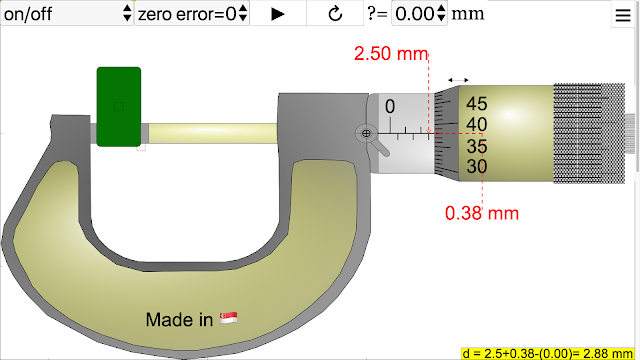
First part of the measurement: 2.5 mm
Second part of the measurement: 0.38 mm
Final measurement: 2.88 mm
Now, we shall try with zero error. 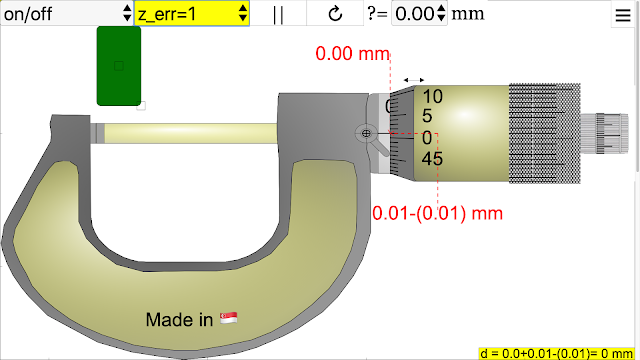
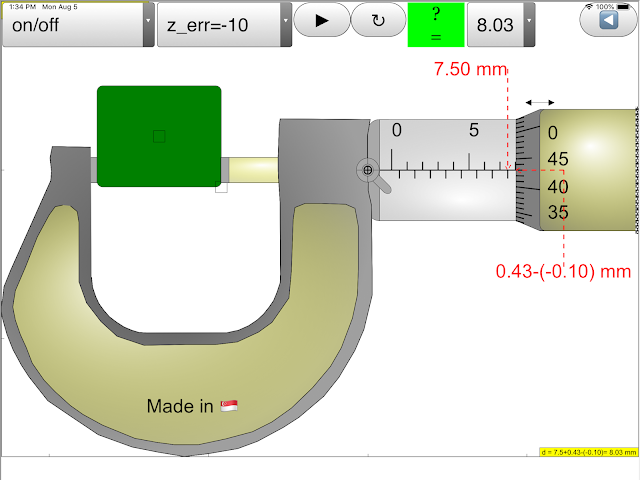
The reading on the bottom is the measurement obtained and the reading at the top is the zero error. Find the actual measurement. (Meaning: get rid of the zero error in the measurement or take into account the zero error)
Measurement with zero error: 1.76 mm 
Zero error: + 0.01 mm (positive because the zero marking on the thimble is below the datum line)
Measurement without zero error: 1.76–(+0.01)=1.75 mm
iCTLT2016 ePosterGuide Example
Video iCTLT2016 Sample of ePoster by lookang lawrence wee
Research
arXiv:1408.3803 [pdf]
Vernier caliper and micrometer computer models using Easy Java Simulation and its pedagogical design feature-ideas to augment learning with real instruments
Loo Kang Wee, Hwee Tiang Ning
Comments: 8 pages, 8 figures, Physics Education journal
Subjects: Physics Education (physics.ed-ph); Instrumentation and Detectors (physics.ins-det)
https://youtu.be/jHoA5M-_1R4
Worksheet
- more worksheets:
 Physics_lab_Sharjah_
University_Tahani_Alsarayreh - Worksheet 📖 ejss_model_Micrometer02 Tahani Ibrahim Ragheb AL Sarayreh physics department :Sharjah University : UAE measurment of density.docx 06 June 2020
- Worksheet 📖 ejss_model_Micrometer02 Tahani Ibrahim Ragheb AL Sarayreh physics department :Sharjah University : UAE measurment of density.pdf 06 June 2020
- Worksheet 📖 :ejss_model_Micrometer02_measurments of density 1 Nawal Nayfeh, Physics instructor at university of sharjah, UAE.pdf 25 May 2020
- Worksheet 📖 :ejss_model_Micrometer02_measurments of density 1 Nawal Nayfeh, Physics instructor at university of sharjah, UAE.docx 20 May 2020
Screenshots
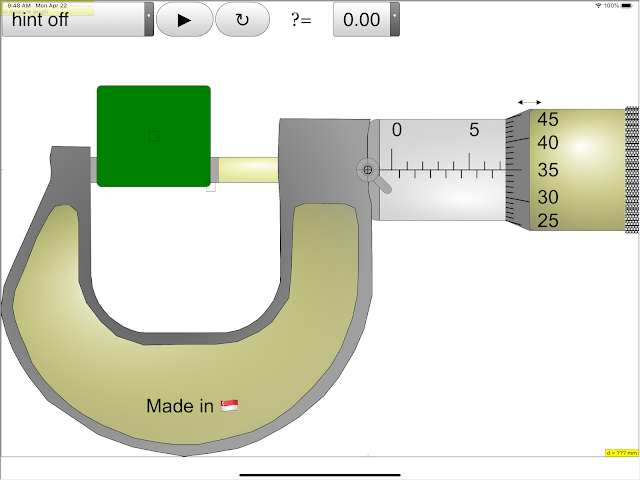
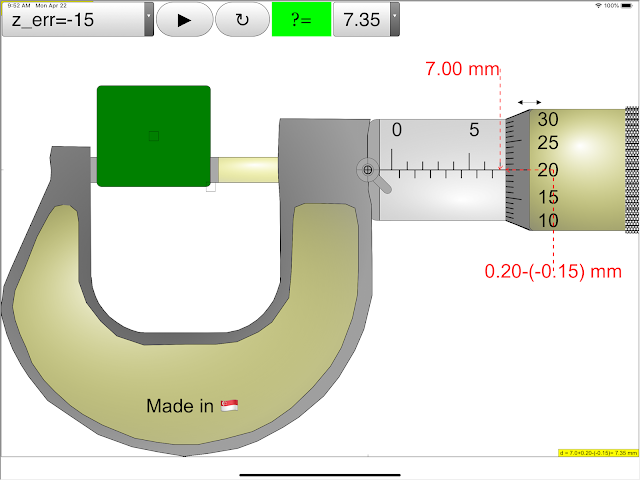
Micrometer iOS App 6.5 inch, probably the world's best!
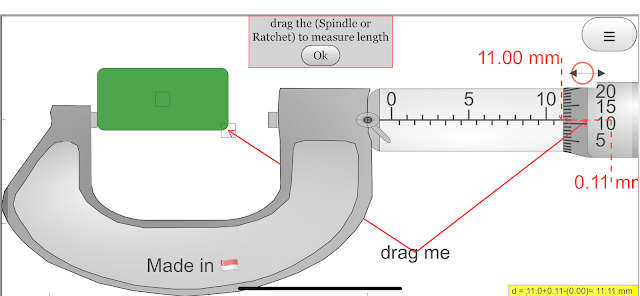 |
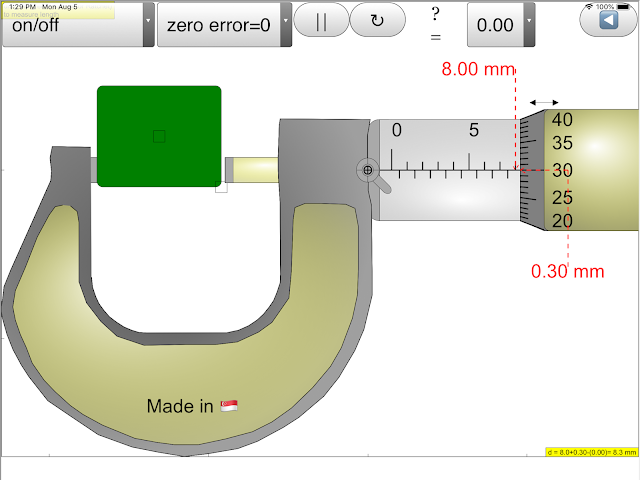
| First default screen after clicking the expand menu button https://sg.iwant2study.org/ospsg/index.php/6-micrometer02 Fullscreen App version Direct link https://sg.iwant2study.org/ospsg/index.php/1005-micrometer02manualversion Manual version Direct link |
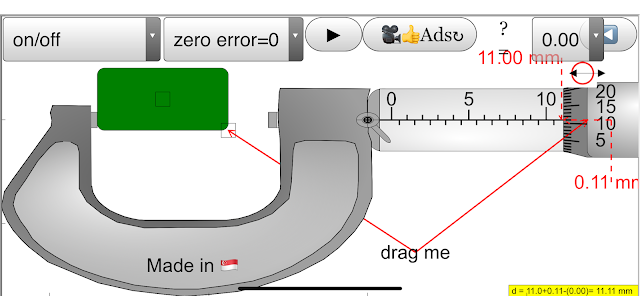 |
| default screen after clicking the expand menu button https://sg.iwant2study.org/ospsg/index.php/6-micrometer02 Fullscreen App version Direct link https://sg.iwant2study.org/ospsg/index.php/1005-micrometer02manualversion Manual version Direct link |
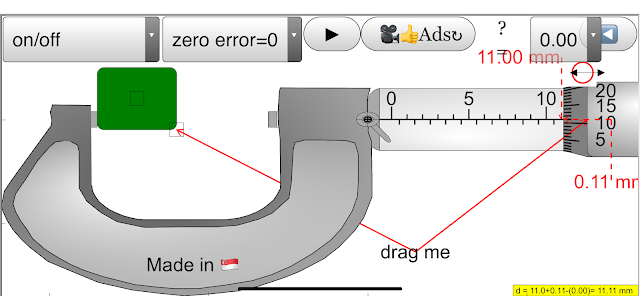 |
| default screen after clicking the expand menu button https://sg.iwant2study.org/ospsg/index.php/6-micrometer02 Fullscreen App version Direct link https://sg.iwant2study.org/ospsg/index.php/1005-micrometer02manualversion Manual version Direct link |
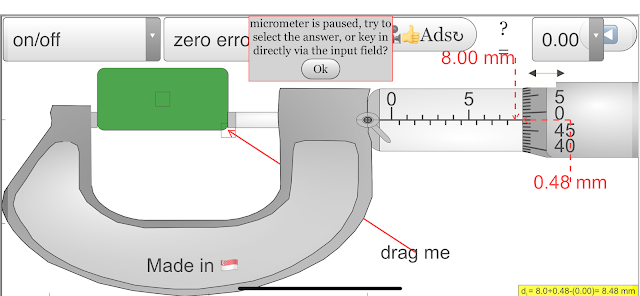 |
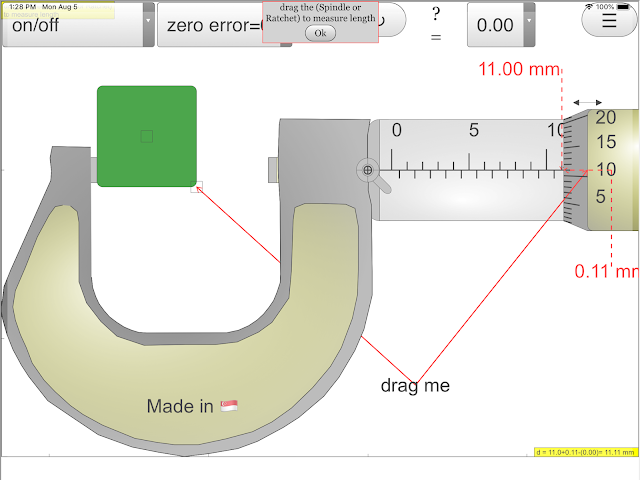
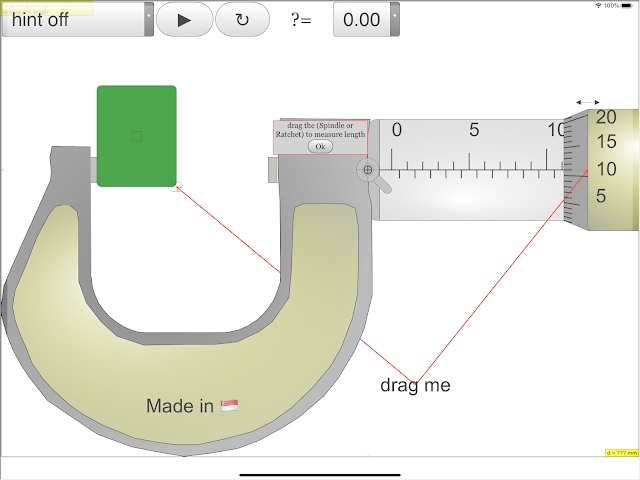
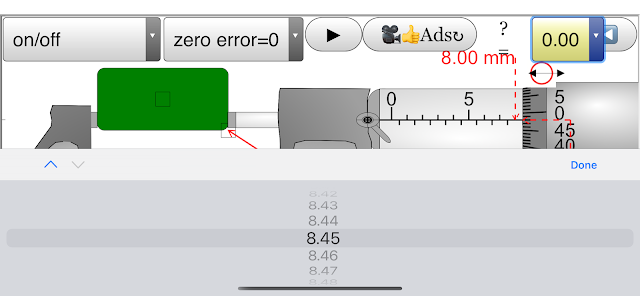
| When ratchet touch object, new pop up message appears to guide next step https://sg.iwant2study.org/ospsg/index.php/6-micrometer02 Fullscreen App version Direct link https://sg.iwant2study.org/ospsg/index.php/1005-micrometer02manualversion Manual version Direct link |
 |
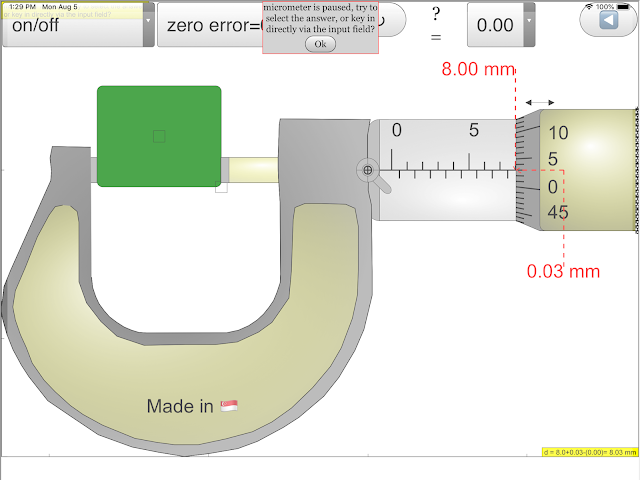
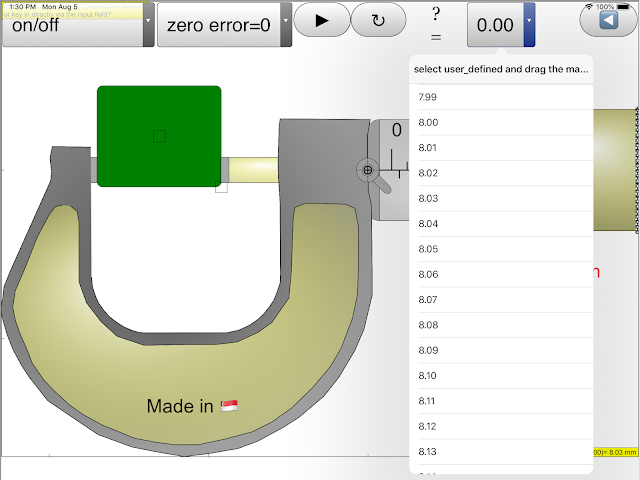
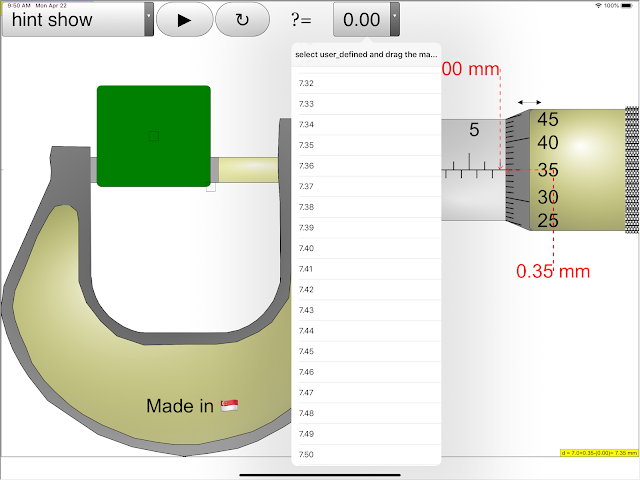
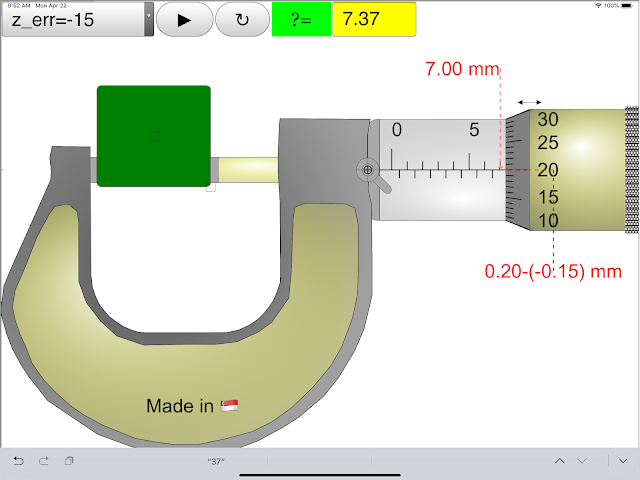
| scroll on answer combo box to correct attempted answer https://sg.iwant2study.org/ospsg/index.php/6-micrometer02 Fullscreen App version Direct link https://sg.iwant2study.org/ospsg/index.php/1005-micrometer02manualversion Manual version Direct link |
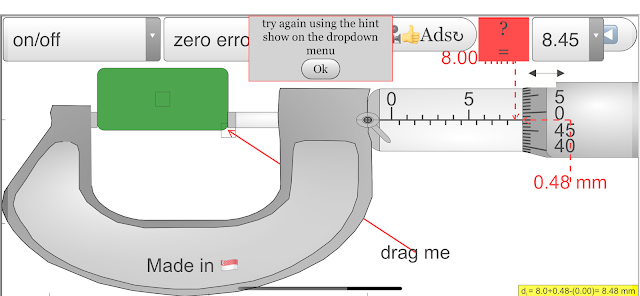 |
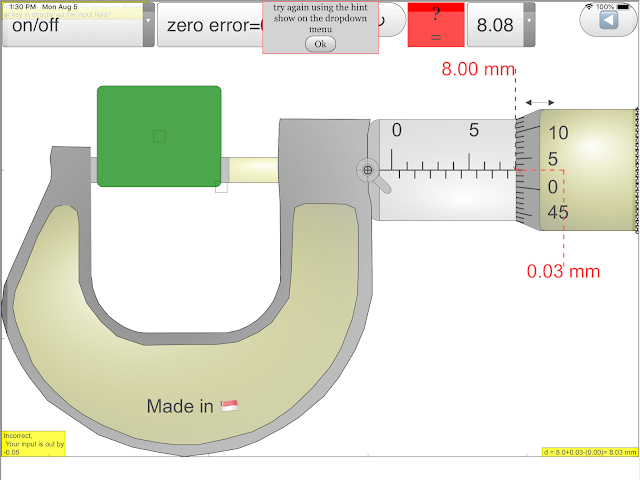
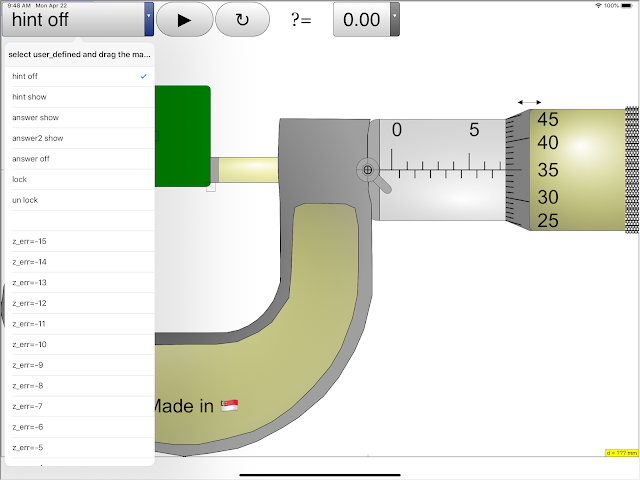
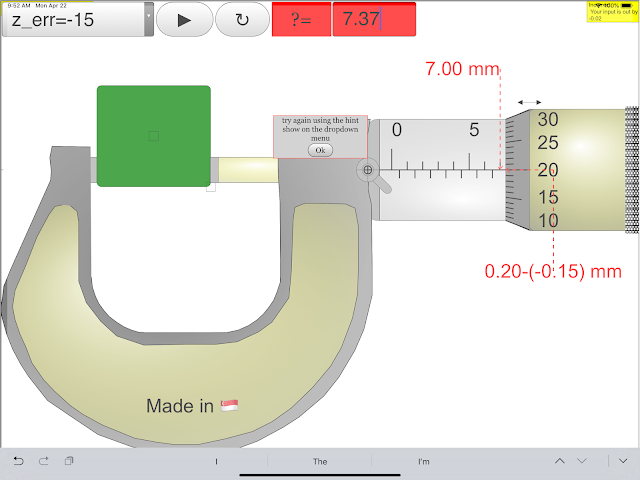
| when answer is wrong, gives hint to try to show the hint on option on the first combo box https://sg.iwant2study.org/ospsg/index.php/6-micrometer02 Fullscreen App version Direct link https://sg.iwant2study.org/ospsg/index.php/1005-micrometer02manualversion Manual version Direct link |
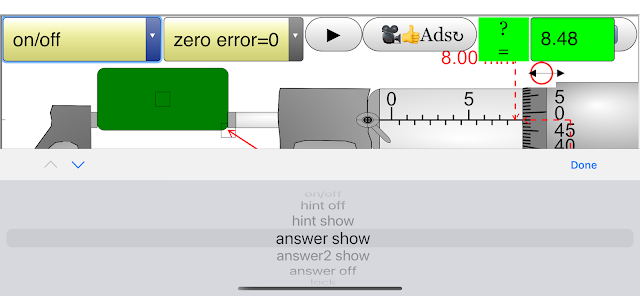 |
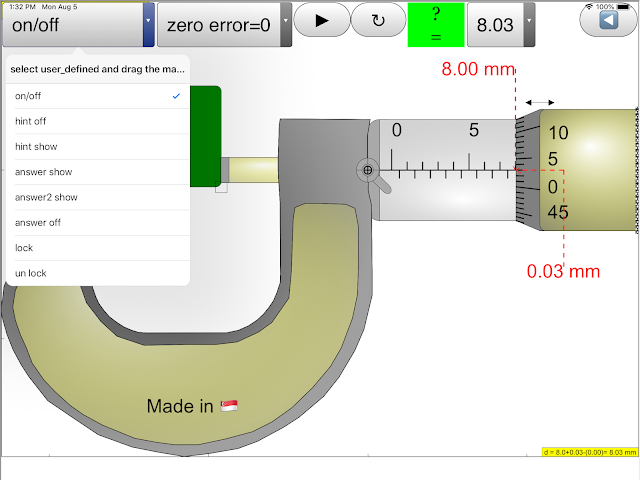
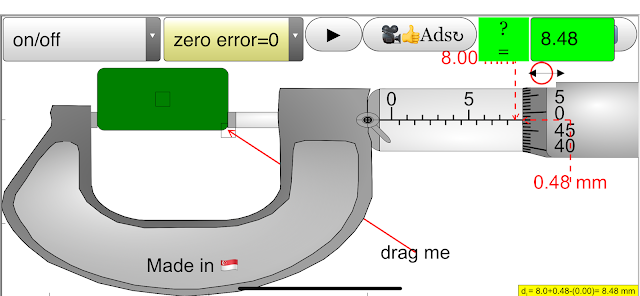
| able to show answer or hide https://sg.iwant2study.org/ospsg/index.php/6-micrometer02 Fullscreen App version Direct link https://sg.iwant2study.org/ospsg/index.php/1005-micrometer02manualversion Manual version Direct link |
 |
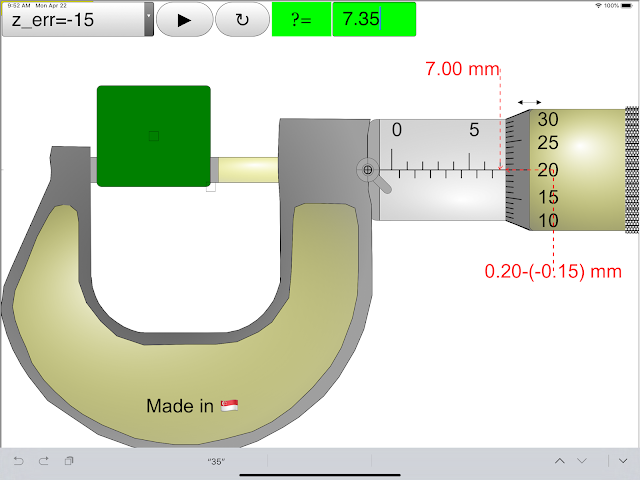
| click on the ?= to toggle between combo box (quick answers method) and input field (keyboard method) https://sg.iwant2study.org/ospsg/index.php/6-micrometer02 Fullscreen App version Direct link https://sg.iwant2study.org/ospsg/index.php/1005-micrometer02manualversion Manual version Direct link |
 |
| second combo box allows zero error introduction https://sg.iwant2study.org/ospsg/index.php/6-micrometer02 Fullscreen App version Direct link https://sg.iwant2study.org/ospsg/index.php/1005-micrometer02manualversion Manual version Direct link |
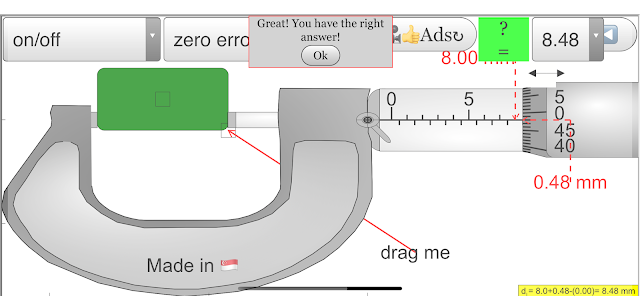 |
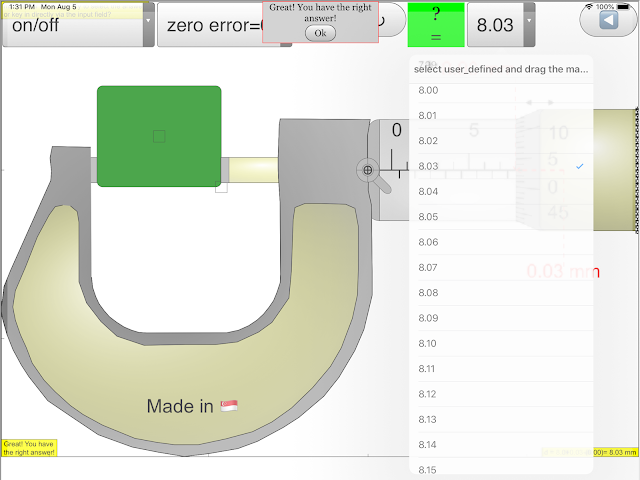
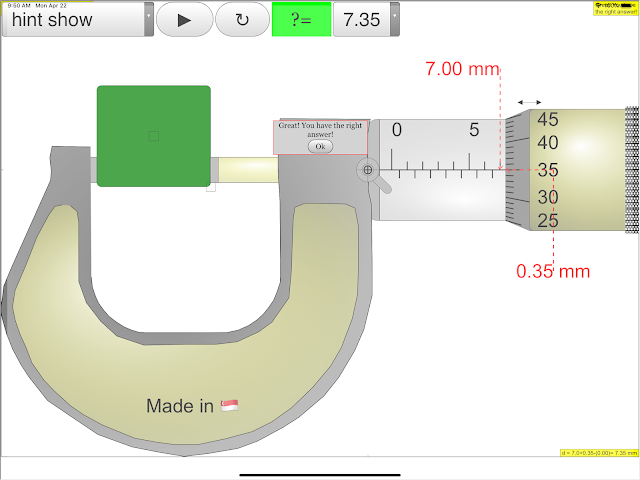
| affirms when answer is correct! https://sg.iwant2study.org/ospsg/index.php/6-micrometer02 Fullscreen App version Direct link https://sg.iwant2study.org/ospsg/index.php/1005-micrometer02manualversion Manual version Direct link |
Micrometer iOS App 12.9 inch, probably the world's best!
Video
Youtube by Kim Kia Tan
Youtube by Kim Kia Tan
Sample Learning Goals
(g) describe how to measure a variety of lengths with appropriate accuracy by means of tapes, rules, micrometers and calipers, using a vernier scale as necessary.
Version:
- https://weelookang.blogspot.com/2024/01/mastering-precision-with-digital.html
- http://weelookang.blogspot.sg/2015/07/ejss-micrometer-model.html?m=1 by Fu-Kwun Hwang and lookang JavaScript version blogpost
- http://weelookang.blogspot.sg/2010/06/ejs-open-source-micrometer-java-applet.html by Fu-Kwun Hwang and lookang Java version blogpost
- http://iwant2study.org/lookangejss/01_measurement/ejs/ejs_model_Micrometer02.jar by Fu-Kwun Hwang and lookang Java version digital library
- http://www.phy.ntnu.edu.tw/ntnujava/index.php?topic=567.0 by Fu-Kwun Hwang and lookang Java version
- http://www.phy.ntnu.edu.tw/ntnujava/index.php?topic=683.0 by Fu-Kwun Hwang Java version
- http://www.phy.ntnu.edu.tw/ntnujava/index.php?action=post;topic=502.0 by Fu-Kwun Hwang Java version mirror here
Other Resources
- http://www.vjc.moe.edu.sg/fasttrack/physics/macrometer_ya_v6.htm by VJC requires Flash
- http://www.upscale.utoronto.ca/PVB/Harrison/Micrometer/Flash/FullAnimation.html Animation
- http://www.upscale.utoronto.ca/PVB/Harrison/Micrometer/Flash/MicSimulation.html Animation
- https://www.geogebra.org/m/qedrwymk By Seng kwang
- https://simphy.com/weblets/micrometer-simulator/
end faq
- Details
- Written by Loo Kang Wee
- Parent Category: 01 Foundations of Physics
- Category: 01 Measurements
- Hits: 6308


