Briefing Document: Creating Single Android and iOS Apps with EjsS and Ionic
1. Overview
This document outlines the process of creating mobile applications (both Android and iOS) from pre-packaged models generated by Easy JavaScript Simulations (EjsS). The core idea is to leverage the EjsS tool to create the simulation content and then use the Ionic framework to package that content into a deployable mobile app. This approach allows for the development of cross-platform apps using web technologies (HTML, CSS, JavaScript) with the performance and user experience similar to native apps.
2. Key Technologies and Tools
- EjsS (Easy JavaScript Simulations): This is the authoring tool used to create interactive simulations. The resulting simulations can be "pre-packaged" into a ZIP file for use with Ionic.
- Ionic: A framework for building hybrid mobile apps using web technologies. Ionic provides tools for creating apps that run on Android and iOS devices as if they were native apps. The document emphasizes that "IONIC provides tools to create JavaScript+HTML programs that run on mobile devices as if they were native apps."
- Node.js & npm: Node.js is the JavaScript runtime environment, and npm (Node Package Manager) is used to manage the packages and dependencies required by Ionic, which is described as "the largest ecosystem of open source libraries in the world."
- Android Studio: Required for building Android apps. It is noted that "This is simple but requires a lot of time to download and install all the necessary files SDK versions, extra features etc."
- XCode: Required for building iOS apps. The document states clearly, "If you intend to produce iOS apps you need a Mac and X-code. no Mac, no screenshot."
- Cordova: Used as a wrapper to give the app access to native device features. It is mentioned when installing ionic, ") npm install -g cordova"
3. Core Workflow
The document details the following steps in the app creation process:
a. Software Setup & Initial Configuration
* **Install Android Studio and Node.js:** These are the foundational pieces for creating Android apps and managing the required packages. The document emphasizes the importance of Node.js version 6 or later.
* **Install Cordova and Ionic:** Use the Node.js command line and npm to install these key technologies. It includes the specific commands:
* `npm install -g cordova`
* `npm install -g ionic` (or `npm install -g ionic@beta` for the latest version).
* **Install Specific Packages:** The document highlights the need to install specific packages for the project.
* `sudo npm install angular-ui-router`
* `sudo npm install angular-sanitize`
* **Create a project folder:** A dedicated folder to store all the Ionic apps is essential. An example folder is "MyAppsFolder" where all projects are saved.
b. Creating the Ionic Project
* **Use the `ionic start` command:** This command is used to create a new Ionic project using different pre-built templates like blank, complex-list, maps, salesforce, sidemenu and tabs.
* Example command: `ionic start MyModelApp blank`
* **Change Directory:** Navigate into the newly created project folder.
* Example command: `cd MyModelApp`
* **Add target platforms:** specify which platforms the app should be built for.
* `ionic platform add android`
* `ionic platform add ios`
* **Add plugins:** Required plug-ins such as screen orientation, in-app browser and others are specified. The plugin command is needed for URLs to function correctly and for zoom functions.
* `cordova plugin add cordova-plugin-screen-orientation`
* `cordova plugin add cordova-plugin-inappbrowser`
* `cordova plugin add cordova-plugin-wkwebview-engine`
* `cordova plugin add https://github.com/kumbe/Phonegap-ZoomControl.git`
c. Incorporating EjsS Content
* **Extract the EjsS pre-packaged ZIP file:** The document notes that this file is typically named `ejss_app_XXX.zip`.
* **Copy the contents of the extracted folder:** The content is copied into the `www` folder of the Ionic project, replacing existing files. The `lib` folder of the Ionic project will remain unchanged.
d. Customization and Configuration
* **Resources:** The document specifies that icons and splash images can be modified using the command:
* `ionic resources`
* **Configuration Files**: The guide recommends edits for `bower.json`, `config.xml` and `package.json` files to change project details (e.g. name, description).
**e. Testing and Deployment**
* **Test locally with `ionic serve`:** This command starts a local web server for testing the app in a browser.
* The document notes "The Firefox browser seems to be able to detect the exact error code better than Chrome."
* **Build for Android/iOS:** Use the `ionic build android` and `ionic build ios` commands to create platform-specific build files. The Android process may require additional Android SDK tools, which can be installed using the Android SDK Manager.
* **Debug APK generation**: The output of the command is an "android-debug.apk" file which can then be tested on an Android device.
* **Release APK generation:** involves additional steps of keytool, jarsigner and zipalign before publishing the file. This process is important to sign the app, prepare it for release, and publish it to app stores.
* `cordova build --release android`
* `ionic build android --release`
* `keytool -genkey -v -keystore my-release-key.keystore -alias lookang -keyalg RSA -keysize 2048 -validity 10000`
* `jarsigner -verbose -sigalg SHA1withRSA -digestalg SHA1 -keystore my-release-key.keystore android-release-unsigned.apk lookang`
* `zipalign -v 4 android-release-unsigned.apk ejss_model_shm161.apk`
4. Best Practices and Debugging
- Icon and Splash Images: Use images of the same size as the ones replaced.
- Version Control: Increment the version value in config.xml when updating the app for the Google Play Store.
- Debugging: The document recommends using the Firefox browser to debug.
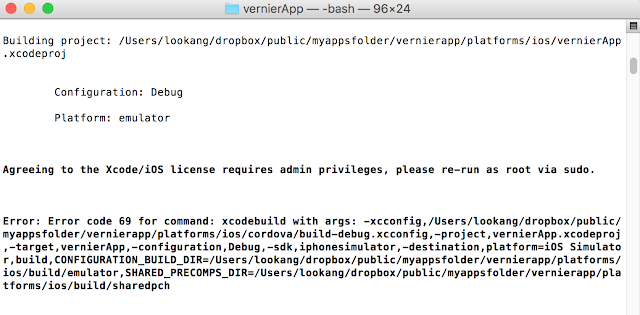
- Troubleshooting: It notes errors related to changing between Windows and MacOSX that can be solved with commands like chmod +x hooks/after_prepare/010_add_platform_class.js or "just launch xcode and type in your account password to give xcode the permission to write to hard drive."
- Also, commands like ionic resources and npm rebuild node-sass are recommended to fix different build errors.
5. Key Insights & Takeaways
- Hybrid App Approach: The strategy relies on using web technologies to build cross-platform applications. This is an effective method of using EjsS content on multiple platforms without needing to write native code for each.
- Toolchain Complexity: The process requires installing and managing a series of tools, including Android Studio, Node.js, Cordova, and Ionic.
- Platform-Specific Steps: While most of the process is cross-platform, building for iOS requires a Mac and Xcode. The document indicates that there are platform-specific build steps and error handling needed.
- Importance of Command Line: A significant portion of the workflow is done through the command line.
- Importance of a signing key: The signing key should be kept in a safe place so updates can be submitted.
6. Quote Highlights
- "IONIC provides tools to create JavaScript+HTML programs that run on mobile devices as if they were native apps."
- "This is simple but requires a lot of time to download and install all the necessary files SDK versions, extra features etc."
- "If you intend to produce iOS apps you need a Mac and X-code. no Mac, no screenshot."
- "...npm, is the largest ecosystem of open source libraries in the world."
- "The Firefox browser seems to be able to detect the exact error code better than Chrome."
- "Make sure to save this file somewhere safe, if you lose it you won’t be able to submit updates to your app!"
7. Conclusion
This document provides a comprehensive guide to creating single Android and iOS apps using EjsS simulations packaged with the Ionic framework. The process involves multiple steps, from setting up the necessary tools to deploying the final application. It highlights the benefits of hybrid app development while also acknowledging the complexity of the toolchain. The detailed instructions make this guide a good reference for someone wanting to take an EjsS simulation and make it a mobile app for Android and/or iOS.
http://weelookang.blogspot.sg/2016/08/creating-single-apps-using-easy.html
Creating Single Apps written by paco and lookang
Steps to create an App from an EjsS prepackaged model
This short guide explains how to create an Android App from your prepackaged model (i.e. from the ZIP file you obtained with the Prepackage for App option of EjsS menu.)
You need to install a software platform called IONIC in your computer that allows you to do so. IONIC provides tools to create JavaScript+HTML programs that run on mobile devices as if they were native apps. EjsS just helps you prepare the contents of such a program to boost your IONIC process.
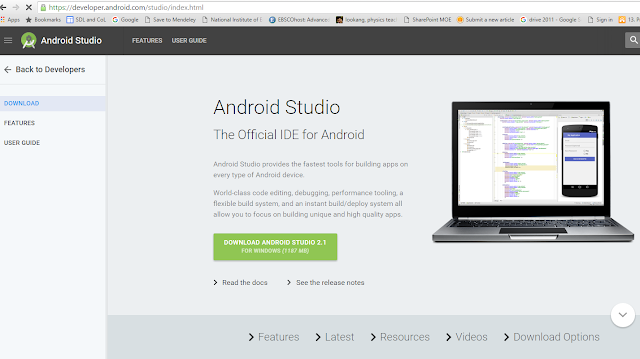
- Basic Program needed: Android Studio, just follow the link and agree to install it. This is simple but requires a lot of time to download and install all the necessary files SDK versions, extra features etc. If ever the error is encountered, the trick is to download all the SDKs and update the packages for the process to be completed.
- If you intend to produce iOS apps you need a Mac and X-code. no Mac, no screenshot.
- Install Node.js version 6 or later in your computer system because of it's package ecosystem, npm, is the largest ecosystem of open source libraries in the world.
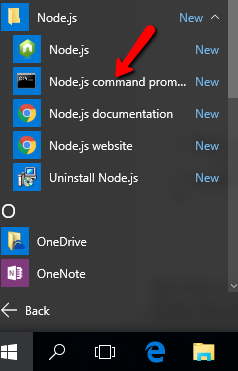
- Open up the Node.js command line and use the follow command without the \( sign, where \) character indicates the operating system prompt. If you are using a Mac, please add sudo (If you are on a Mac computer, you may want to follow these instructions.) in front of the npm..... the instructions here are for Windows OS.
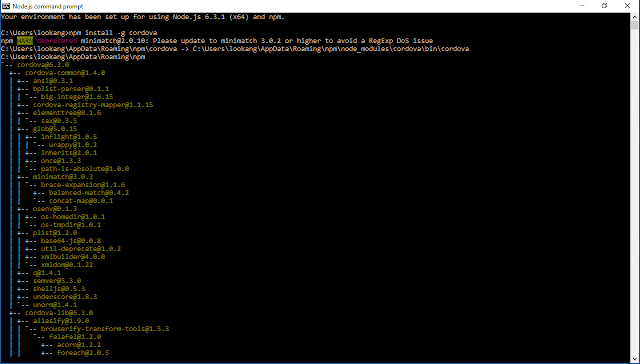
- \( npm install -g cordova
- you should see an output from installing cordova using the npm command implying it is successfully installed
- next Install IONIC in your computer (if you haven’t done so before) using the following command, use the ionic 2 beta if you want the latest version.
- \) npm install -g ionic
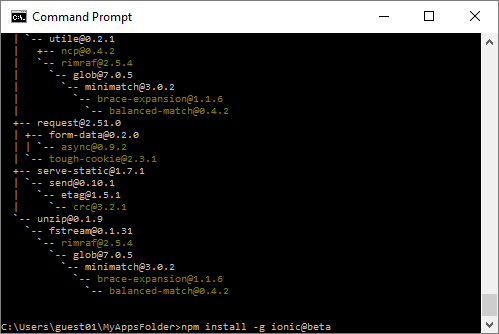
- \( npm install -g ionic@beta<div< a=""> class="separator" style="clear: both; text-align: center;">
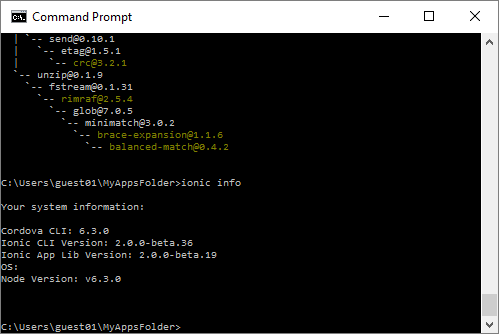
- when installation may be slow and when is completed, the screen should look like this. The tasks in this step need to be done only once, no matter how many IONIC Apps you create.(Note: You need Internet connection for this.)
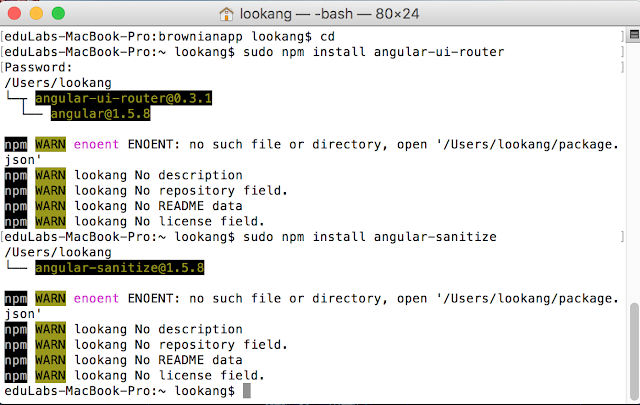
- The next two commands install specific packages that we will use in our particular projects, which didnt seem to run correctly.
- \) sudo npm install angular-ui-router
- \( sudo npm install angular-sanitize
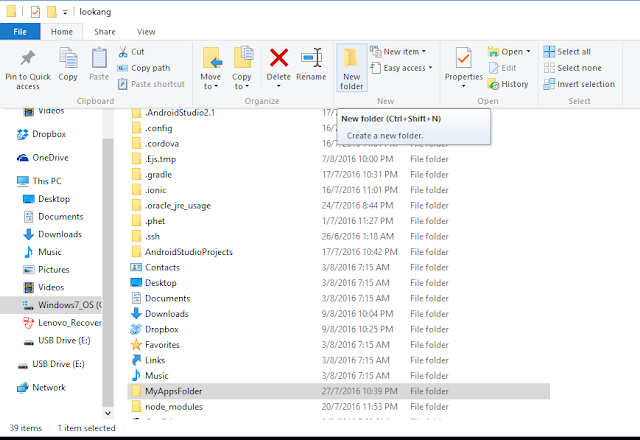
- Organisation of project folder: make a folder to hold all the ionic app projects let's call it MyAppsFolder
- Goto or change directory the folder just created as the folder for all apps
- \) cd MyAppsFolder
- Creating Apps using Ionic: We now exemplify the creation of an IONIC project called, say MyModelApp. In what follows, replace the word MyModelApp by the name you chose for your new app. Create using any of the templates IONIC project:
- \( ionic start MyModelApp blank
- \) ionic start MyModelApp complex-list
- \( ionic start MyModelApp maps
- \) ionic start MyModelApp salesforce
- \( ionic start MyModelApp sidemenu
- \) ionic start MyModelApp tabs
- Let's say to create a new blank IONIC project:
\( ionic start MyModelApp blank
This takes a few seconds… and creates a new directory (called MyModelApp) in your hard disk. (When asked: Create an ionic.io account to send Push Notifications and use the Ionic View app?, you can answer no: n) - Change directory to the newly create directory (again, replace MyModelApp with the name you used in the step before):
- \) cd MyModelApp
- Add target platforms Android (works on both Windows and Mac), it should work because Android Studio was installed before hand.
- \( ionic platform add android
- Add target platforms iOS (only works if you have xcode installed on a Mac)
- \) ionic platform add ios
- Add particular plug-ins that we use in our projects: // seems to be needed for URL from app to browser to work
- \( cordova plugin add cordova-plugin-screen-orientation
- \) cordova plugin add cordova-plugin-inappbrowser
- \( cordova plugin add cordova-plugin-wkwebview-engine //(This last one is optional. Might improve speed on speed-savvy simulations.)
- \) cordova plugin add https://github.com/kumbe/Phonegap-ZoomControl.git // http://www.plugreg.com/plugin/kumbe/Phonegap-ZoomControl experimenting with zoom
- Copy files from your prepackage to the IONIC project. Now, we will extract the prepackaged files created with EjsS and work to modify the www folder of your project: UNZIP the file you created with EjsS (typically called ejss_app_XXX.zip)
- From the extracted folder copy all files and subfolders into your project’s www folder, even if this means replacing existing files and folders. (Actually, only the project’s libfolder will remain unchanged.)
- Best practices details. Change the icon and splash images in resources (for IONIC to create platform specific images.) Make sure you use images of the same size of those you replace.
- \( ionic resources
- Optional details. You may want to edit using NotePad++ recommended the following entries in IONIC files of your project:bower.json: Change the name property.
config.xml: Change the name, description and author entries.
package.json: Change the name and description entries. - Test App. To test the app, but the best test is still package a debug apk and serve it to a phone. The Firefox browser seems to be able to detect the exact error code better than Chrome. Or if you still want to try the line is below.
- \) ionic serve
- Exit the test server by entering q.
- Deploying the debug app. This process can produce a number of errors. Mainly because you need to install the Android SDK tools required for compilation of Androids apps for the target version indicated by the Ionic project. For this, you may need to run the Android SDK Manager and install a number of packages. When successful, the last message will tell you where is the android-debug.apk file that was generated. Send this file to your Android device and install it. It should work.
- \( ionic build android
- \) ionic build ios
- Prepare for keytool, jarsigner and zipalign.
- on MacOSX, the path need to be added typing something like this in Terminal:
- \( export PATH=\)PATH:/Users/lookang/Library/Android/sdk/build-tools/24.0.1
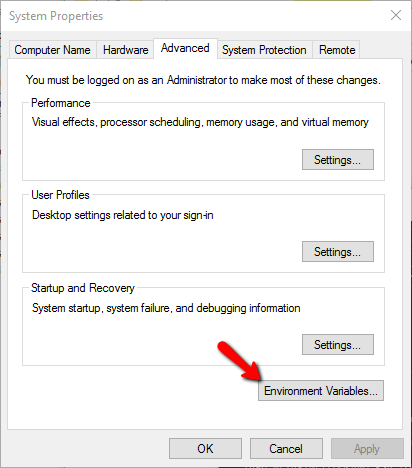
- type in env and select the Environment Variables to allow the command line to be valid
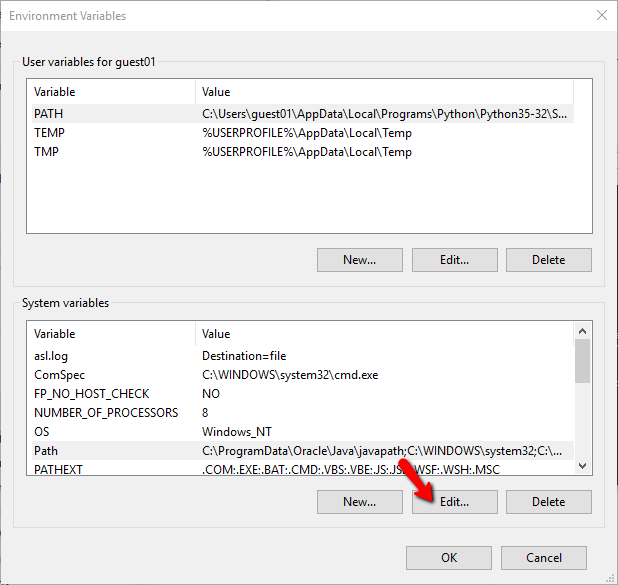
- select Environment Variables - System variables Edit
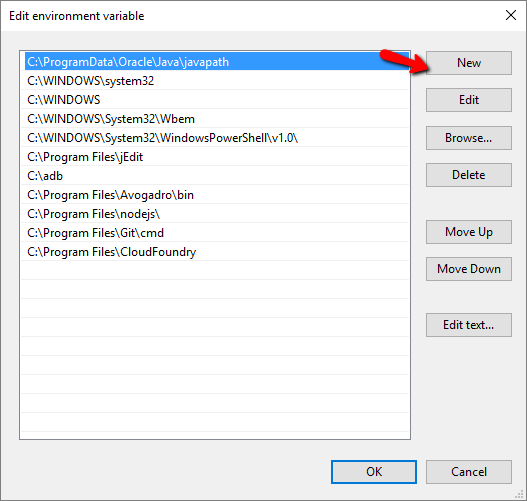
- select new and key in the respective file location in to the PATH for the command lines to work properly
- It will appear as User Variables and you need properly these, the jdk for keytool and jarsigner, the android/sdk for zipalign
- C:\Program Files\Java\jdk1.8.0_92\bin
- C:\Users\guest01\AppData\Local\Android\sdk\build-tools\24.0.1
- Deploy the release app. To generate a release build for Android, we can use the following cordova cli command:
- \( cordova build --release android
- \) ionic build android --release
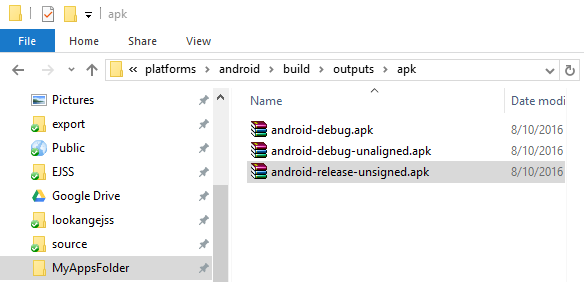
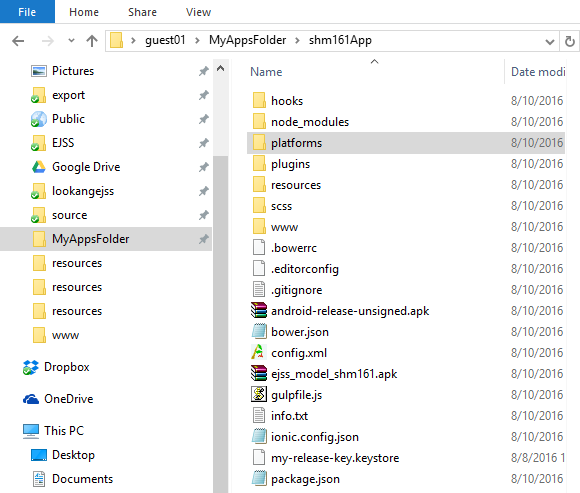
- navigate to the folder C:\Users\guest01\MyAppsFolder\shm161App\platforms\android\build\outputs\apk and copy the file android-release-unsigned.apk into the Appfolder say C:\Users\guest01\MyAppsFolder\shm161App
- Let’s generate our private key using the keytool command that comes with the JDK. If this tool isn’t found, refer to the installation guide:
- \( keytool -genkey -v -keystore my-release-key.keystore -alias lookang -keyalg RSA -keysize 2048 -validity 10000
- You’ll first be prompted to create a password for the keystore. Then, answer the rest of the nice tools’s questions and when it’s all done, you should have a file called my-release-key.keystore created in the current directory.
- Note: Make sure to save this file somewhere safe, if you lose it you won’t be able to submit updates to your app!
- To sign the unsigned APK, run the jarsigner tool which is also included in the JDK:
- This signs the apk in place. Finally, we need to run the zip align tool to optimize the APK. The zipalign tool can be found in C:\Users\guest01\AppData\Local\Android\sdk\build-toils\24.0.1

- \( zipalign -v 4 android-release-unsigned.apk ejss_model_shm161.apk
- send this apk to https://play.google.com/apps/publish/ and start publishing your own apps!
- Updating your App
- As you develop your app, you’ll want to update it periodically. In order for the Google Play Store to accept updated APKs, you’ll need to edit the config.xml file to increment the version value, then rebuild the app for release.
- Debugging Environment
- Sometimes when changing computer from Windows and MacOSX, this error could happen. How to fix this Error: spawn EACCES. To solve this use the command
- chmod +x hooks/after_prepare/010_add_platform_class.js
- Sometimes when changing computer from Windows and MacOSX, this error could happen.
- just launch xcode and type in your account password to give xcode the permission to write to hard drive
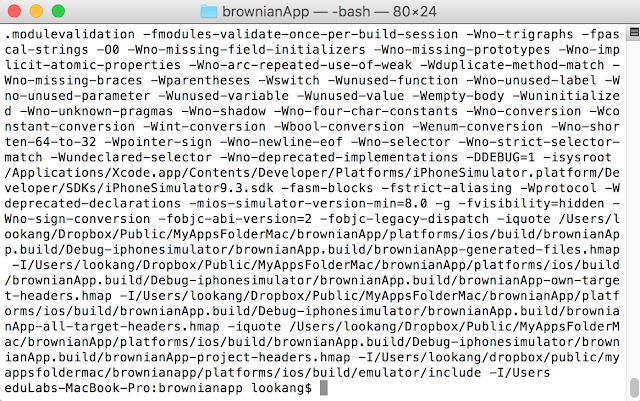
- Sometimes when changing computer from Windows and MacOSX, this error could happen.** BUILD FAILED ** The following build commands failed: CompileAssetCatalog /Users/lookang/dropbox/public/myappsfolder/vernierapp/platforms/ios/build/emulator/vernierApp.app vernierApp/Images.xcassets. to solve this problem type this to build the ios resources pictures icons and splash
- \) ionic resources
- Sometimes when changing computer from Windows and MacOSX, this error could happen. There is an error in your gulpfile: Error: Missing binding/Users/lookang/Dropbox/Public/MyAppsFolder/dcmotorApp/node_modules/node-sass/vendor/darwin-x64-48/binding.node Node Sass could not find a binding for your current environment: OS X 64-bit with Node.js 6.x Found bindings for the following environments:- Windows 32-bit with Node.js 6.x This usually happens because your environment has changed since running `npm install`. Run `npm rebuild node-sass` to build the binding for your current environment.
- $ npm rebuild node-sass
FAQ: Creating Mobile Apps from EjsS Models using IONIC
- What is the basic idea behind creating mobile apps from EjsS models? The core concept is to use a prepackaged model (a ZIP file created with EjsS) and convert it into a mobile app using the IONIC framework. EjsS prepares the model's content, while IONIC provides the tools to make it run on Android and iOS devices as if it were a native app, using JavaScript and HTML.
- What are the main software requirements for developing these apps? You'll need several tools:
- Android Studio: To build Android apps, including installing necessary SDKs.
- Xcode (for iOS): Required for building iOS apps, which means you need a Mac.
- Node.js: Version 6 or later, which is required for npm, the package manager used by Ionic.
- IONIC framework: Used to generate and manage the cross-platform app development.
- What are the command line steps to install the necessary tools? The required command-line instructions are as follows (note that the \ symbol indicates the command prompt):
- npm install -g cordova (Installs Cordova, a platform to build mobile apps.)
- npm install -g ionic (Installs the Ionic framework, use npm install -g ionic@beta for latest version.)
- npm install angular-ui-router (Installs an angular package for routing.)
- npm install angular-sanitize (Installs an angular package for sanitizing content.) (Mac users may need to preface these with sudo, e.g., sudo npm install -g cordova)
- How do I create a new IONIC project from scratch and what are templates useful for? You use the command ionic start MyModelApp <template> where MyModelApp is the desired name for your project and <template> is a predefined layout that can be blank, complex-list, maps, salesforce, sidemenu or tabs.. For instance, ionic start MyModelApp blank will create a new blank Ionic project. Templates provide a starting point, but are often not the ones used for these apps from EjsS.
- After creating a new project, what other setup steps are necessary? After creating the project (and navigating to its directory with cd MyModelApp), you'll need to:
- Add the target platforms using ionic platform add android and ionic platform add ios (if you intend to develop on iOS and have Xcode installed on a Mac).
- Add essential Cordova plugins with commands like cordova plugin add cordova-plugin-screen-orientation, cordova plugin add cordova-plugin-inappbrowser, and cordova plugin add cordova-plugin-wkwebview-engine. These add specific functionalities to the app.
- Replace the contents of the project's www folder with the extracted files from your prepackaged EjsS model.
- What is the recommended process for testing and debugging the app? To test and debug the app:
- Use ionic serve to preview it in a browser, with Firefox often being more effective at identifying error codes than Chrome.
- For real testing, generate a debug APK (ionic build android) and install it on an Android device.
- For iOS you have to build the project through xcode.
- How do I prepare my app for release? To prepare for a release build for Android:
- Generate a release build with cordova build --release android or ionic build android --release.
- Generate a private key using the keytool command and sign the unsigned APK with jarsigner.
- Optimize the APK with the zipalign tool, all available in the Android development SDK package you install earlier.
- The resulting apk is what is sent to the Google Play Store.
- How do I update my app after it has been released? To update a released app, you need to:
- Increment the version number in the config.xml file.
- Rebuild the app for release following the same process as described above. This new APK will have the new version and will be accepted by the Google Play Store.

