P5 Condensation Lesson with Interactive Simulation and CLC Explanation Scaffolds is a Primary 5 Science lesson package that helps students observe, explain, and apply condensation using a physical experiment, a digital simulation, multimodal images, CLC sentence frames, and quick checks for understanding.
The lesson is based on a Community Gallery module and has been strengthened with misconception checks, visible heat-transfer cues, student photo evidence, and a cold-water versus hot-water comparison prompt.
Resource type: Primary 5 Science lesson, HTML5 interactive simulation, PDF activity, CLC explanation scaffold, multimodal condensation visuals
Topic: Condensation, change of state, gas to liquid, water vapour, cooler surface, heat loss, temperature difference, daily-life science examples
Open the full lesson Run the simulation Open source PDF Download interactive ZIP
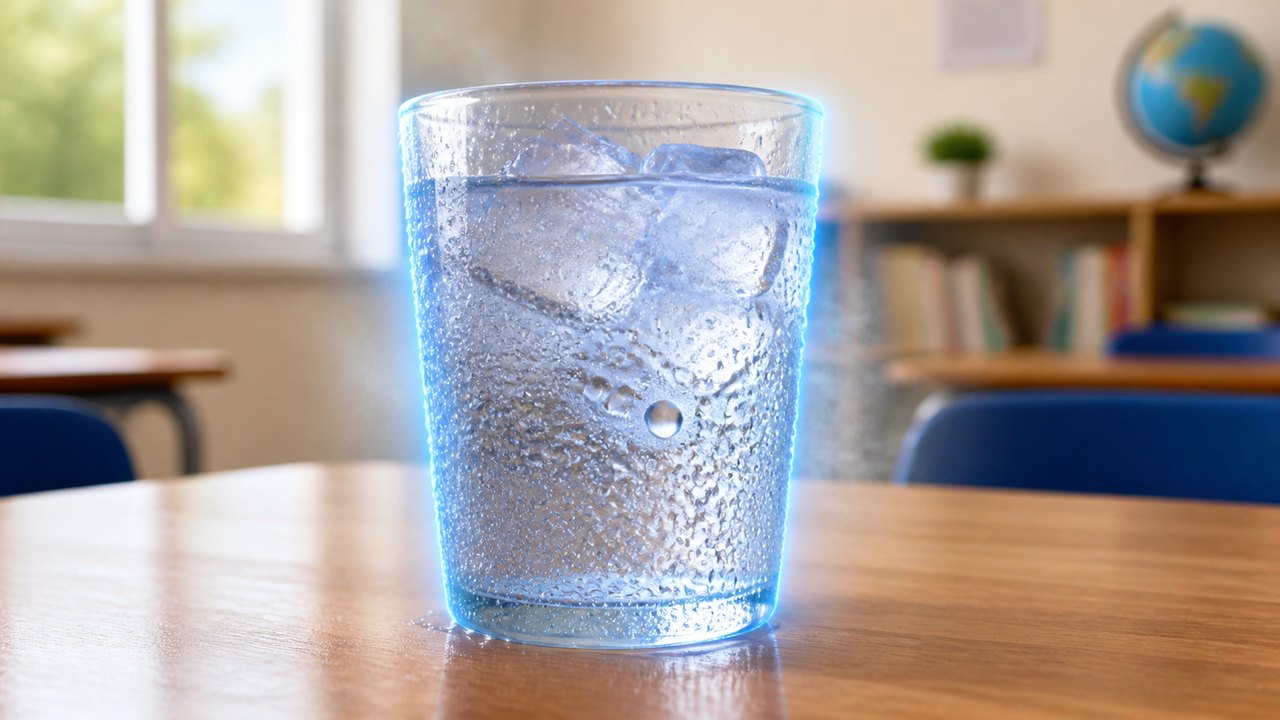
Why this lesson is useful
Condensation is often easy for students to notice but harder for them to explain accurately. Students may see droplets on a cold cup and assume that the water came from inside the cup. This lesson makes the source of the droplets explicit: water vapour in the surrounding air touches the cooler outer glass surface, loses heat, and condenses into liquid water droplets.
The lesson also compares cold-water and hot-water cases. In both cases, water vapour loses heat and becomes liquid droplets. The difference is the source of the water vapour and the surface where droplets form: cold water causes droplets on the outside of the glass, while hot water can produce droplets inside the glass and under the cover.
Learning design
- Physical experiment: students predict and observe cold water, room-temperature water, and hot water setups.
- Interactive simulation: students test 5 °C, 30 °C, and 70 °C water and compare the results table.
- Visible heat transfer: a mini-model shows water vapour touching a cooler surface, losing heat, and forming droplets.
- CLC explanation frame: students explain with Comes into contact, Loses heat, Condenses.
- Daily-life extension: students can add or paste their own condensation photo and write a CLC explanation.
Suggested classroom flow
- Start with the cold glass image and ask where the water droplets came from.
- Run the physical experiment or use the interactive simulation to compare the three temperatures.
- Discuss the heat-transfer model before students read the explanation text.
- Use the CLC frame to model a foggy spectacles example.
- Let students explain the warm lunchbox cover and one example from home or school.
- Use the short quiz and exit pass to check understanding and collect remaining questions.
Common misconceptions addressed
- Misconception: droplets on the outside of a cold cup leaked from the water inside.
Better idea: they came from water vapour in the surrounding air. - Misconception: condensation happens only when something is cold.
Better idea: condensation happens when water vapour loses heat to a cooler surface. - Misconception: hot water and cold water condensation are unrelated.
Better idea: both involve water vapour losing heat and changing from gas to liquid, but the source and droplet location differ.
Credits and license
This lesson package was prepared from a Primary 5 condensation Community Gallery module and enhanced with web-based scaffolds, multimodal images, and a local HTML5 simulation for Open Educational Resources / Open Source Physics @ Singapore.
Contents are shared for educational use under the Creative Commons Attribution-Share Alike 4.0 Singapore License unless otherwise stated.